
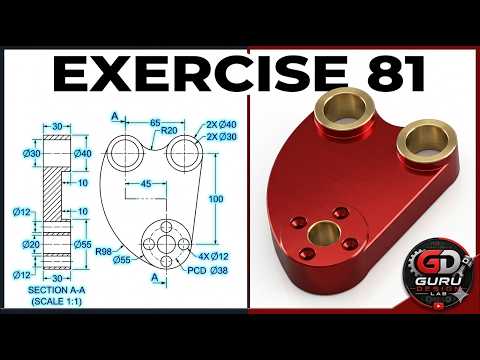
Welcome to Guru Design Lab! Are you a beginner looking to sharpen your 3D CAD modeling skills? Mastering mechanical design starts with understanding the basic building blocks. In this tutorial based on Exercise 81, we will guide you through the process of creating a precise 3D mechanical part, starting with a clean and fully defined SolidWorks 2D sketch.
Step 1: Laying the Foundation with a 2D Sketch
Before jumping into complex 3D features like Extrude Boss or Cut, every successful design begins on a flat plane. Choosing the right sketching plane—whether Front, Top, or Right—is your crucial first step. In this exercise, you will learn how to draft basic geometric shapes, set essential dimensions, and apply geometric relations like tangency and parallelism. Creating a well-structured SolidWorks 2D sketch prevents rebuild errors and ensures your design remains parametric and flexible for future modifications.
Step 2: Transforming Your Profile into a 3D Part
Once your initial sketch is fully defined (represented by solid black lines in the interface), it is time to give your model depth. By applying 3D features such as Boss-Extrude, Fillets, and Extruded Cuts, you can turn flat shapes into realistic mechanical components. Learning how to efficiently manipulate a SolidWorks 2D sketch allows you to unlock more advanced features later, such as Revolve, Loft, and Sweep, with total confidence.
Key Tips for CAD Beginners
To streamline your modeling workflow in SolidWorks, keep these essential practices in mind: - Always Anchor to the Origin: Start your initial sketch at the origin point to maintain clear reference coordinates. - Relations Before Dimensions: Apply geometric constraints (horizontal, vertical, concentric) before adding numerical dimensions to keep the sketch stable. - Keep it Simple: Divide complex mechanical parts into multiple simple sketches rather than trying to draw everything in a single, cluttered sketch.
Conclusion
Building strong CAD habits takes practice, but following structured exercises makes the learning curve much smoother. Check out the full video tutorial from Guru Design Lab to follow Exercise 81 step-by-step, practice your technique, and boost your 3D modeling proficiency today!


