
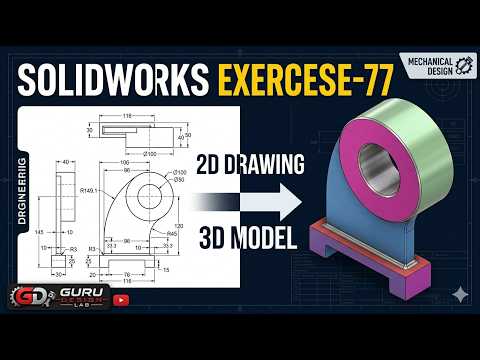
Welcome to the workbench of digital design! If you are looking to sharpen your CAD skills and move from basic shapes to complex engineering components, you have come to the right place. In this guide, inspired by Guru Design LAB, we are diving deep into Exercise 77—a classic mechanical part design challenge that bridges the gap between conceptual sketches and functional 3D reality.
Transforming 2D Sketches into 3D Mastery
In the world of mechanical engineering, the ability to interpret technical drawings is a foundational skill. This SolidWorks 2D tutorial is specifically designed to help you take a flat, two-dimensional blueprint and turn it into a fully realized 3D model. Whether you are a student preparing for certification or a professional looking to refine your workflow, mastering the transition from sketch to feature is essential for creating precise, manufacturable components.
The Workflow: From Layout to Final Part
The process begins with a careful analysis of the technical dimensions provided in Exercise 77. The foundation of any high-quality 3D model is a clean, "fully defined" sketch. By following this SolidWorks 2D tutorial approach, we start by establishing the primary geometry on the appropriate plane.
By focusing on geometric constraints—such as horizontal, vertical, and tangent relations—we ensure that the model remains parametric. This means that if a dimension changes later in the production cycle, your model will update seamlessly without breaking. Once the base sketch is locked in, we utilize essential features like 'Extruded Boss/Base' to provide the part with its initial volume.
Refining the Details
After the main body is established, the focus shifts to secondary features. Exercise 77 involves adding intricate details like bored holes, specialized cut-outs, and fillets. Each step is a lesson in precision, ensuring that the final digital output matches the engineering specifications exactly. We also explore the best practices for using the "Mirror" and "Pattern" tools to save time and maintain symmetry across the design.
Why Practice Exercise 77?
Mechanical part design is as much about logic as it is about creativity. Engaging with this SolidWorks 2D tutorial allows you to see the "order of operations" required to build complex parts efficiently. By the end of this exercise, you will have a much deeper understanding of how to manage the Feature Manager design tree and how to troubleshoot common sketching errors.
Keep practicing, stay curious, and continue building your expertise one sketch at a time!


