
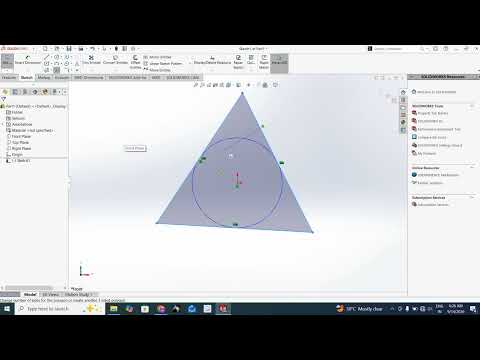
Creating precise multi-sided geometric shapes is a fundamental skill for any CAD designer. Whether you are modeling hex bolts, nuts, or intricate structural components, the Polygon tool is an essential feature you need to master. In this guide, we will break down how to effectively use the Polygon command in SolidWorks to streamline your 2D sketching workflow.
Accessing the Polygon Command
To get started, open a new or existing sketch in your workspace. Look for the Polygon icon in the Sketch tab on the CommandManager, or navigate to Tools > Sketch Entities > Polygon.
Once activated, the PropertyManager will open on the left side of your screen, displaying several customization settings. Here, you can specify the number of sides your polygon should have, ranging anywhere from 3 (an equilateral triangle) up to 40 sides.
Understanding Inscribed vs. Circumscribed Circle Options
One of the most critical aspects of mastering this feature in SolidWorks is understanding the two construction circle options available in the PropertyManager:
- Inscribed Circle: The construction circle is drawn inside the polygon, tangent to the midpoints of each side. This option is ideal when you know the flat-to-flat distance (across-flats dimension), which is commonly used when designing standard hex fasteners or wrench fittings.
- Circumscribed Circle: The construction circle passes through all the outer vertices of the polygon. Use this option when your design parameters are defined by the maximum corner-to-corner outer diameter.
Best Practices to Fully Define Your Polygon
By default, a newly drawn polygon is under-defined, meaning it can still be resized, dragged, or rotated. To fully define your sketch in SolidWorks, follow these quick steps:
- Fix the Location: Anchor the center point of the polygon to the sketch origin or an existing reference point using a Coincident relation.
- Set the Size: Add a Smart Dimension to the construction circle (either inscribed or circumscribed).
- Lock the Orientation: Select one of the polygon's line segments or construction lines and apply a Horizontal or Vertical geometric relation to prevent rotation.
Conclusion
Mastering the Polygon tool allows you to create complex geometry in seconds without manually calculating angles or drawing individual lines. Incorporate these tips into your daily workflow to keep your parametric sketches clean, accurate, and easy to edit.


