
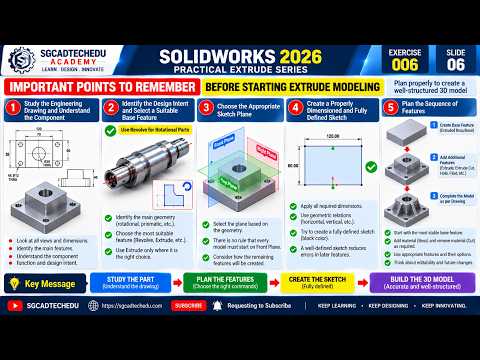
The leap from a 2D sketch to a 3D model is one of the most fundamental skills in computer-aided design (CAD). With the release of SOLIDWORKS 2026, the Extruded Boss/Base command remains the cornerstone of this process. Whether you are a beginner or an experienced designer, understanding how to efficiently transform a SolidWorks Drawing into a three-dimensional part is essential for high-quality engineering.
The Foundation of 3D Design
Every great 3D model starts with a well-defined sketch. Before you can utilize the Boss Extrude command, you must ensure your SolidWorks Drawing is fully constrained and mathematically accurate. In Practical Exercise 006, we focus on the core principles of using the 2026 interface to select contours and apply thickness to your designs. By mastering these basics, you reduce the risk of errors in later assembly stages.
Exploring Boss-Extrude Options
The Extruded Boss/Base tool is more than just a "thickness" button. In the latest version of SOLIDWORKS, the property manager offers several powerful options to control how your geometry grows:
- Blind: The most common option, where you specify a precise numerical depth.
- Mid Plane: Ideal for maintaining symmetry, this extrudes the sketch equally in both directions from the original plane.
- Up To Surface/Vertex: These options are perfect for complex designs where you need the extrusion to terminate at a specific part of the existing geometry.
Using these options correctly ensures that your SolidWorks Drawing translates perfectly into the physical or digital prototype you intend to build.
Practical Exercise 006: Step-by-Step
In this exercise, we walk through the specific workflow of creating a mechanical component. We start by selecting the sketch plane, drawing the necessary geometry, and then applying the Extruded Boss command. We highlight how to use the "Draft" feature within the extrude menu to add a taper—a critical step for parts intended for injection molding or casting.
Efficiency in SOLIDWORKS 2026
The 2026 update introduces smoother transitions and more intuitive selection breadcrumbs, making it easier than ever to modify your extrusions on the fly. By focusing on practical exercises, you build the muscle memory needed to navigate the software's deep feature set without losing creative momentum.
Mastering the Boss Extrude command is the first step in becoming a SOLIDWORKS expert. Start with a clean sketch, choose the right end conditions, and watch your concepts come to life in 3D.


